
Notice: I receive compensation if you buy something through affiliate links on this post. This does not change the price you would pay. As an Amazon Associate I earn from qualifying purchases.
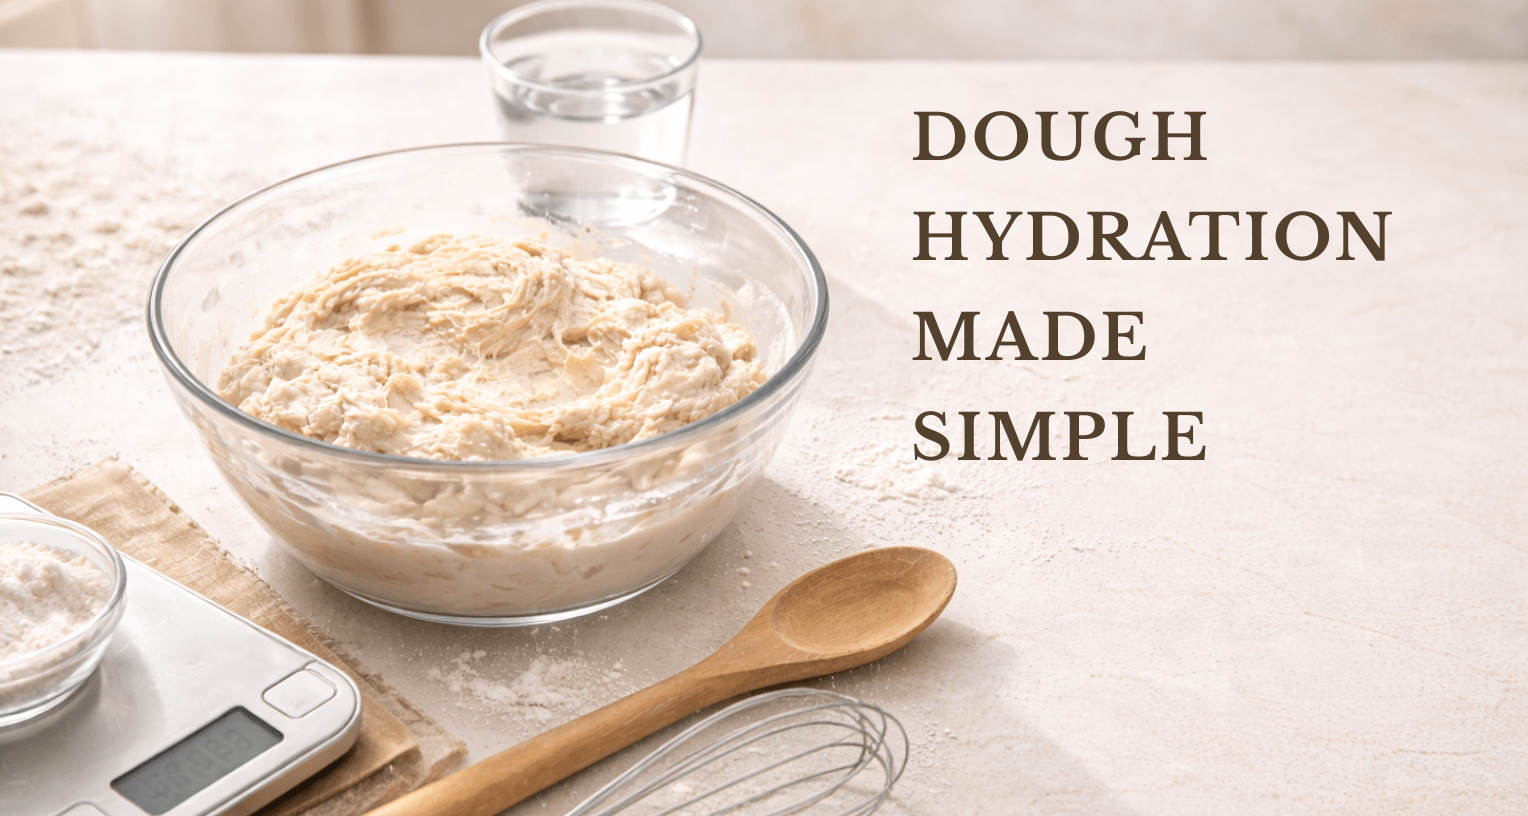
This page is your quick dough hydration reference for bread and pizza.
Start with the chart below, then adjust by 2–3% at a time until the dough mixes, stretches, and shapes the way you expect in your kitchen
Table of Contents
- 1 Dough Hydration Chart (Bread Dough Quick Reference)
- 2 Pizza Dough Hydration Chart (By Style)
- 3 What Is Dough Hydration?
- 4 How Dough Hydration Changes Bread Texture and Handling
- 5 How to Calculate Dough Hydration (Step-by-Step)
- 6 Best Pizza Dough Hydration (How to Choose Yours)
- 7 Ideal Hydration Range for Sourdough Bread
- 8 Tools for Precisely Measuring Water (and Why It Matters)
- 9 Troubleshooting Very Sticky High Hydration Dough
- 10 How to Adjust Hydration for Your Kitchen and Your Flour
- 11 Mini Experiment: Find Your Best Hydration in 3 Bakes
- 12 The Hydration Sweet Spot
Dough Hydration Chart (Bread Dough Quick Reference)
| Dough type | Typical hydration % | Texture goal | Handling notes |
|---|---|---|---|
| Sandwich loaf (lean) | 60–70% | Soft, even crumb, clean slices | Easy to shape, holds form well, light tackiness |
| Dinner rolls (enriched) | 55–65%* | Soft, fine crumb, tender bite | Less sticky, more structured dough, fats change handling |
| Baguette-style | 65–75% | Light interior, thinner crust, moderate openness | Tacky but manageable, benefits from rests and gentle shaping |
| Country loaf (lean hearth) | 70–80% | More open crumb potential, strong oven spring | Stickier dough, needs strength building (folds + fermentation control) |
| Focaccia (pan-baked) | 75–90% | Airier crumb, soft interior, crisp edges in a pan | Very sticky, handled in-pan, oiling the pan prevents sticking |
| Ciabatta-style | 75–85% | Open, irregular holes, light interior | Wet dough, folds are more useful than heavy kneading |
| Sourdough (beginner-friendly) | 65–75% | Predictable shaping, balanced crumb | Holds structure better, easier to score, less spread |
| Sourdough (more open crumb goal) | 75–85% | More openness and lighter interior | Stickier and more fermentation-sensitive, strength and timing matter |
*Enriched dough ranges are based on water only. Milk, eggs, and fats change how the dough feels, so use these percentages as a starting point and adjust by feel.
Want the chart in a printable format? 📥 Download the printable Dough Hydration Cheat Sheet (PDF) and keep it with your baking notes.
How to use this chart: Choose a hydration range based on your bread style, then mix and observe the dough.
If it feels tighter than expected, increase water by 1–2%; if it spreads or feels overly sticky, reduce slightly or strengthen with folds and rest.
Adjust in small steps so you change the feel without changing the dough’s character.
In this guide, you’ll see hydration ranges for common bread and pizza styles, learn how to calculate hydration correctly even with sourdough starter, and understand how to adjust sticky or slack dough without guessing.
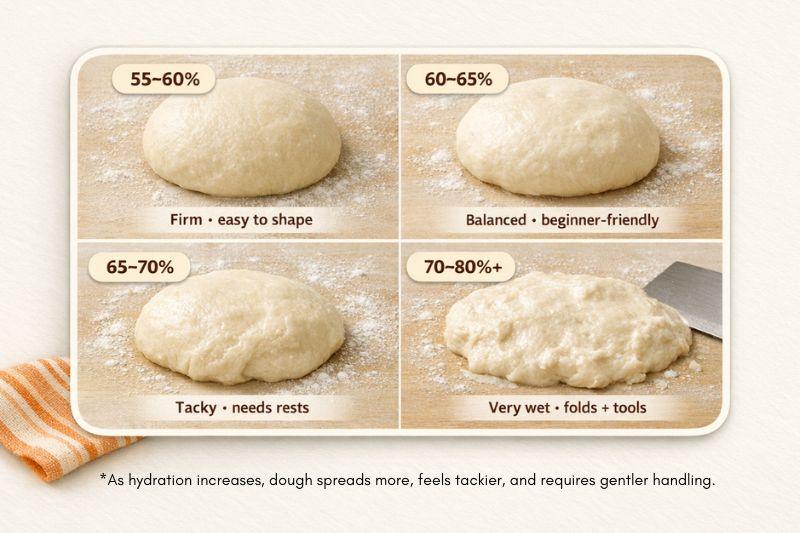
- Hydration predicts handling first—firmer at lower %, tackier at higher %.
- Start with a range, then adjust in 1–2% steps based on dough behavior.
- Flour type and humidity can change how “wet” the same % feels.
- Enriched doughs don’t behave like lean doughs—use ranges as a starting point, not a strict rule.
- High hydration needs rests, folds, and tools (scraper/wet hands), not lots of extra flour.

Save this Pin for later
Everyday breads (sandwich loaf, dinner rolls, enriched dough)
Everyday breads are built for predictable structure and clean slicing, so lower-to-mid hydration ranges are common.
These doughs usually hold shape well, which makes them a good baseline when you’re learning how hydration changes handling.
Lower-hydration doughs require more mechanical effort during kneading, so if you bake bread often, my guide to the best stand mixer for bread dough can help.
Lean hearth breads (baguette-style, country loaf)
Lean hearth breads use just flour, water, salt, and yeast or starter, so hydration percentages are more comparable across recipes.
As hydration rises, handling becomes tackier, and fermentation timing matters more, but you also gain potential for oven spring and openness.
High-hydration styles (ciabatta, focaccia, pan-style doughs)
High-hydration styles aim for a lighter interior and are often supported by a pan or minimal handling. Build strength with rests and folding, and use tools (scraper, wet hands, lightly oiled surfaces) instead of adding more flour.
For larger batches or very wet doughs above 75%, a bowl-lift mixer offers more stability and power, which I cover in my KitchenAid 7-quart stand mixer review.
Sourdough ranges (beginner-friendly vs open-crumb goals)
Sourdough can feel different at the same hydration because fermentation is longer and strength changes as it matures.
For consistency, start in the beginner-friendly range; for a more open crumb, increase gradually and tighten fermentation control so the dough doesn’t spread.
Pizza Dough Hydration Chart (By Style)
Pizza hydration depends on style, oven heat, and flour strength. Use the chart below to choose a starting range for your style, then adjust in 1–2% steps based on stretch, stickiness, and bake results.

| Style | Typical hydration % | Best for | Notes |
|---|---|---|---|
| Neapolitan-style | 58–65% | Very hot ovens, quick bakes, airy rim | Works best with strong flour and high heat; dough can be harder to handle if too wet |
| New York-style | 60–68% | Stretchable dough, foldable slice, balanced chew | Often uses oil and longer cold fermentation; moderate hydration supports easy stretching |
| Pan / Detroit / Sicilian | 70–85% | Soft, airy crumb with crisp edges in a pan | Pan supports wetter dough; oiling the pan prevents sticking and boosts browning |
| Thin / cracker-style | 45–55% | Crisp, dry, snappy crust | Lower hydration reduces puffing; roll or press thin and dock to limit bubbles |
How to use this chart: Choose a hydration range based on your pizza style and oven heat, then mix and test the dough.
If it resists stretching or snaps back, increase water by 1–2%; if it feels overly sticky or hard to transfer, reduce slightly or build more strength with rest and proper mixing.
Adjust in small steps, so you refine handling without changing the style’s character.
Neapolitan-style (hot oven focus)
Neapolitan-style dough is built for high heat and very fast bakes, so hydration is usually moderate.
Too much water can make shaping harder and can lead to a softer, less defined base unless your oven heat is high enough to drive moisture off quickly.
If you’re baking hot and fast, stay near the middle of the range. If your oven runs cooler, lowering hydration slightly usually improves structure and browning.
New York-style (stretch & chew)
New York-style dough needs easy stretching and a chewy bite without tearing.
Moderate hydration supports extensibility, especially with cold fermentation.
Many formulas include oil, which changes tenderness and handling, so use hydration as the baseline and judge the dough by stretch and strength.
If your dough resists stretching and snaps back, slightly higher hydration can help. If it sticks and tears easily, reduce hydration or increase strength with proper mixing and rest.
Pan, Detroit, or Sicilian (softer, airy crumb)
Pan styles are where higher hydration shines because the pan supports the dough and helps it bake through while staying airy.
Higher hydration helps create a lighter interior, and oil in the pan prevents sticking and improves crisp, browned edges.
If you want more openness, move up by 2–3%. If the dough feels hard to handle, keep hydration steady and focus on folds and fermentation control.
Thin or cracker-style (lower hydration)
Thin and cracker-style doughs use lower hydration to limit rise and create a crisp, dry crust. The dough should be easy to roll out and should not relax too much. Lower hydration also reduces steam, which helps keep the crust snappy.
If your thin crust puffs or turns bready, reduce hydration slightly and increase baking temperature. If it cracks while rolling, increase hydration a bit or add a short rest before rolling.
What Is Dough Hydration?
Dough hydration is the ratio of liquid to flour in your dough, expressed as a percentage using weight.
Hydration helps you predict, before you start mixing, whether the dough will feel firm and easy to shape or soft and sticky, and whether the finished bread will have a tighter or more open crumb.
It also gives you a repeatable way to adjust recipes, especially when flour brands, seasons, and fermentation change how dough behaves.
Hydration is most useful when you treat it as a reference number, not a score. If the dough feels too stiff or too loose, you adjust hydration in small steps and take notes, so you can recreate the result you liked.
Hydration percentage is only part of the equation. The method you use (autolyse, stretch-and-fold, or more intensive mixing) changes how wet the dough behaves, which I break down in detail in mixing methods in baking.
Understanding how hydration percentages affects dough texture and handling is explained clearly in this dough hydration guide from King Arthur Baking.
How Dough Hydration Changes Bread Texture and Handling
Hydration changes dough performance because water affects gluten development, how easily the dough stretches, how well it traps gas, and how the crumb sets during baking.
Higher hydration can support a lighter, more open crumb, but it also increases stickiness and makes dough strength and control of fermentation more important.
Treat hydration as a planning number, so you can match your technique to the dough you’re making.
If you want to understand why more water increases extensibility but also makes dough stickier and more fermentation-sensitive, the fundamentals are explained in baking science.
Low hydration (stiff dough): structure, tighter crumb, easier shaping
Low-hydration dough uses less water relative to flour, so it develops strength quickly and holds its shape on the bench.
That makes shaping and scoring more predictable, especially if you’re building confidence.
Common results include:
- A more defined loaf shape and cleaner scoring
- A tighter, more even crumb that slices neatly
- Less sticking during mixing and shaping
If you want easier handling, start in a lower hydration range.
Medium hydration: balanced handling + crumb
Medium hydration gives you a dough that is still manageable while allowing more expansion in the oven than stiff dough.
Gluten develops reliably through kneading or folding, and shaping usually holds if fermentation is kept on track.
Common results include:
- A balanced crumb that is light but not wildly open
- Reliable oven spring with typical home techniques
- Mild tackiness, without constant sticking
If you want a dependable everyday loaf, aim for a medium hydration range.
High hydration: open crumb potential, stickier handling
High-hydration dough has more water available for expansion, which can help you get a more open crumb when the dough has enough strength.
The tradeoff is that handling gets harder, and the dough can spread if gluten development or fermentation timing is off.
Common results include:
- A more open, irregular crumb when strength is built through time and folds
- More sticking during mixing, shaping, and transferring
- Higher risk of a flatter loaf if the dough is under-strengthened or overproofed
If you want a more open crumb, plan for rests and folds and keep fermentation tighter.
Very slack doughs can be difficult to control in smaller machines. In my Bosch stand mixer review, I break down how it’s designed to handle wet, sticky dough.
What you’ll see at each range (quick observable cues)
These cues help you spot your hydration range by how the dough behaves during mixing, resting, and shaping. Use them to set expectations for handling. Detailed fixes for sticky or slack dough are in the troubleshooting section.
Low hydration (stiffer dough):
- Holds a compact mound with minimal spreading after mixing
- Resists stretching, tighter feel when you pull the dough
- Surface looks more matte, takes longer to smooth out
Medium hydration (balanced dough):
- Relaxes slightly after mixing but still holds a rounded shape
- Stretches with steady resistance, not tearing quickly
- Surface becomes smooth with normal mixing and a short rest
High hydration (wetter dough):
- Relaxes and spreads more noticeably during rests
- Stretches easily, feels tackier during handling
- Surface can look smoother earlier, but shaping needs more tension control
How to Calculate Dough Hydration (Step-by-Step)
Dough hydration is calculated with weights, not cups.
You add up the total flour and total water from every ingredient that contributes flour or water, then convert that ratio into a percentage.
If you do it the same way each time, the number will match what you see and feel in the bowl.
The standard method for expressing dough hydration — baker’s percentage — and how hydration correlates with dough consistency and final crumb structure is summarized well in the Baker’s percentage entry on Wikipedia
The base formula (with a simple example)
Hydration is calculated as a baker’s percentage wherein flour is the reference.
% Hydration = (total water ÷ total flour) × 100
Example:
Total flour: 500 g
Total water: 350 g
Hydration: (350 ÷ 500) × 100 = 70%
Use weight measure (grams). Small measuring differences in flour amount can shift hydration enough to change handling.
How to calculate hydration with sourdough starter or levain
Starter affects hydration because it contains both flour and water, and both must be included in your totals.
Example rule:
100 g starter at 100% hydration = 50 g flour + 50 g water
Worked example:
500 g flour added directly.
350 g water added directly.
100 g starter contributes 50 g flour + 50 g water.
Total flour = 500 + 50 = 550 g.
Total water = 350 + 50 = 400 g.
Hydration = (400 ÷ 550) × 100 = 72.7%.
If your dough seems wetter than the written hydration, check whether the recipe included the starter water in its math.
How to calculate when you use whole wheat or rye blends
Blending flours does not change the hydration math.
You still add all flour weights. What changes is absorption, so the same hydration may feel stiffer with whole grains.
Example setup:
- Bread flour: 400 g
- Whole wheat: 100 g
- Total flour = 500 g
If total water is 350 g:
- Hydration = (350 ÷ 500) × 100 = 70%
If the dough feels tighter after adding whole wheat or rye, increase water in 2–3% steps to match the handling you want.
Common calculation mistakes (and how to avoid them)
These are the most common reasons hydration “on paper” doesn’t match the dough in your hands.
- Leaving starter water out → your hydration looks lower than it behaves.
Fix: split starter into flour and water, then add both to totals. - Using cups instead of grams → hydration becomes inconsistent across bakes.
Fix: weigh flour and water in grams. - Counting oil as hydration water → the percent rises, but the dough won’t behave like a higher-water dough.
Fix: keep hydration water-based, track oil separately as its own baker’s percentage. - Mixing calculation methods across recipes → hydration numbers stop being comparable.
Fix: choose one method (water-based hydration is the cleanest), and use it consistently.
Best Pizza Dough Hydration (How to Choose Yours)
The best pizza dough hydration is the one that matches your oven’s heat and your comfort handling the dough.
Higher hydration can help you get lighter edges, but only if your dough has enough strength and your bake setup can drive off moisture quickly.
Pick a starting range, then adjust in 2–3% steps based on what you observe: sticking, tearing, spreading, and browning.
If you bake at very high temps (pizza steel/very hot oven)
High-heat baking sets the crust fast and evaporates moisture quickly, so moderate hydration works well.
- Start at 60–65%.
- If the dough is hard to stretch, increase by 2–3%.
- If the center stays pale or floppy, decrease by 2–3%.
If you bake at standard home-oven temps
Home ovens bake off moisture more slowly, so slightly lower hydration often gives better structure and browning.
- Start at 58–62%.
- If the crust bakes up dry or stiff, increase by 2–3%.
- If the dough sticks and spreads too easily, decrease by 2–3%.
If you want easier shaping (less sticking, less tearing)
Lower hydration reduces sticking and makes dough easier to stretch and transfer. It also lowers the risk of thin spots tearing.
- Start at 58–62%.
- If the dough snaps back, add rest time first, then increase by 2–3% if needed.
- If the dough tears during stretching, decrease by 2–3% or strengthen the dough with better mixing and fermentation control.
If you want more airy, open edges (and can handle wetter dough)
Higher hydration can support a lighter rim when fermentation and dough strength are on track. Expect stickier handling.
- Start at 63–68%.
- If your oven struggles with browning, stay closer to 63–65%.
- If the dough spreads and loses structure, decrease by 2–3% or shorten fermentation.
Quick start guide: If you want X → start at Y%
- Easy shaping and clean transfers → 58–62%
- Balanced crust with reliable browning in a home oven → 58–62%
- More airy rim and you can manage stickier dough → 63–68%
- Very hot baking (steel/very hot oven), good lift without extreme stickiness → 60–65%
If you’re close but not quite there, change hydration by 2–3% and keep everything else the same for the next bake. That isolates the variable and makes the adjustment meaningful.
Ideal Hydration Range for Sourdough Bread
Sourdough hydration ranges work best when you factor in two big variables: fermentation and flour absorption.
Sourdough usually ferments longer than yeasted dough, and that extra time changes dough strength and stickiness as acids build and gluten relaxes.
Flour choice matters just as much, because whole grains and lower-absorption flours can make the same hydration feel either stiff or overly slack.
Beginner range (more predictable shaping)
The beginner range is the most forgiving because the dough is easier to strengthen and shape, and it’s less sensitive to small timing errors.
A good starting range for many kitchens is 65–75% hydration.
What this range supports:
- More predictable shaping and better loaf height
- Cleaner scoring, because the dough holds tension more easily
- A crumb that’s balanced and sliceable
If you’re new to sourdough or you’re still dialing in fermentation timing, start here and adjust in 2–3% steps after you’ve baked the same dough a few times.
Intermediate range (more openness, more stick)
The intermediate range gives you more potential for an open crumb, but it requires tighter control of dough strength and fermentation. The dough will be tackier and may spread more if folds and good shaping do not support it
A common range for this stage is 75–85% hydration.
What this range supports:
- More openness and a lighter interior structure
- A thinner-feeling crust and a less “sandwich-like” crumb
- More sensitivity to fermentation, temperature, and flour strength
If the dough looks strong early but turns slack later, keep hydration the same and tighten fermentation first. Hydration is not the only lever.
When high hydration backfires (weak flour, overfermentation, warm dough)
High hydration can work beautifully, but it fails in predictable ways when structure can’t keep up with water and fermentation.
These are the most common causes:
- Weak flour or low absorption: the dough spreads and won’t hold tension during shaping.
- Overfermentation: the dough becomes loose, sticky, harder to tighten, and the loaf bakes flatter.
- Warm dough: fermentation accelerates, gluten relaxes faster, and the dough can become slack before it’s fully shaped.
What to do when you see those signs:
- Lower hydration by 2–3% on the next bake if the dough consistently spreads and can’t hold shape.
- Shorten bulk fermentation if the dough starts strong and then collapses in strength later.
- Cool the process (cooler water, cooler room timing, or a shorter warm bulk) if the dough races and becomes slack.
If your goal is a more open crumb, keep your adjustments small and change one variable at a time. That’s how you learn what hydration is doing in your specific flour and kitchen.
If your bread keeps baking up dense, use my dense bread troubleshooting guide to pinpoint why
Tools for Precisely Measuring Water (and Why It Matters)
Hydration only works as a “repeatable number” if your measuring is repeatable.
Small differences in flour and water add up quickly, especially as hydration increases.
Precision tools keep your dough consistent from bake to bake.
Digital scale (grams) — the non-negotiable tool
A digital scale lets you measure flour and water in grams, which is what hydration math is built on. This is the tool that turns hydration from an estimate into a number you can repeat.
Practical guidelines:
- Use grams for both flour and water.
- Zero (tare) the bowl before each ingredient.
- Weigh water directly into the mixing bowl to avoid losing grams in a measuring cup.
Water temp thermometer (dough temp control)
A thermometer helps you control the water temperature, which affects dough temperature and determines fermentation speed.
When the dough is warmer, fermentation accelerates, and the dough can lose strength sooner, especially at higher hydration.
Use a thermometer when:
- Your kitchen temperature changes seasonally.
- Your dough overproofs faster than expected.
- High-hydration dough turns slack before shaping.
A simple habit that helps: check your water temperature before mixing, then write it down with your hydration percentage.
Container/pitcher tips (easy pouring, consistent measuring)
If you measure water by weight, the container still matters because it affects how cleanly you can pour without spilling or stopping short.
Use containers that make it easy to be accurate:
- A small pitcher with a spout for controlled pouring
- A narrow container that’s easy to hold with one hand
- A clear container if you like to double-check volume, even though weight is the main measurement
If you frequently add bassinage (holding back water), pre-measure the “holdback” water in a small cup so you can add it in controlled amounts.
Optional: dough scraper + spray bottle + bowl scraper (high hydration helpers)
These tools do not change hydration math, but they make higher-hydration dough easier to handle without adding extra flour.
High-hydration helpers:
- Bench scraper: lifts and turns sticky dough cleanly, helps with preshape and cleanup.
- Bowl scraper: moves dough out of the bowl without tearing and reduces waste.
- Spray bottle: adds a light mist to hands or tools to reduce sticking during folds.
If your main problem is sticking, start with a bench scraper. It usually fixes more handling frustration than any single “trick.”
Troubleshooting Very Sticky High Hydration Dough
Sticky dough is not automatically a problem. At higher hydration, some stickiness is expected because more water is available at the surface.
The real question is whether the dough still has strength. If it stretches, holds tension, and responds to folds, it’s behaving normally. If it spreads, tears easily, and won’t tighten, something is off.
If the dough feels hard to read, compare those signs with Underproofed vs Overproofed Dough before assuming the problem is hydration alone.
Sticky but strong (normal) vs sticky and slack (problem)
Sticky dough can still be strong. The difference shows up in how it behaves when you handle it.
Sticky but strong (normal at higher hydration):
- Stretches thin without tearing immediately
- Tightens when you shape it
- Holds a rounded shape for several minutes before relaxing
Sticky and slack (problem):
- Spreads quickly into a flat puddle
- Tears easily when stretched
- Won’t hold tension even after shaping
If the dough is sticky but responsive, focus on building strength and handling technique.
If it is slack and spreading, look at fermentation timing and flour strength before adding more flour.
Fixes that don’t wreck hydration (rest, folds, technique)
The fastest way to “fix” sticky dough is to add flour, but that changes the hydration and the final texture. Try these structure-building steps first.
- Autolyse (rest flour + water before adding salt/starter): improves hydration and gluten formation without extra mixing.
- Stretch-and-fold or coil folds: build strength gradually during bulk fermentation.
- Bench rest: allows gluten to relax so the dough tightens more easily during final shaping.
- Wet hands or lightly damp tools: reduce sticking without changing the formula.
- Bench scraper: lifts and turns dough cleanly, preventing tearing and excess flouring.
If the dough improves after folds and rest, hydration is not the issue. Strength was.

Temperature and fermentation (the hidden causes of “soupy” dough)
High hydration becomes harder to manage when fermentation moves too fast.
Warmer dough ferments faster, acids build more quickly, and gluten relaxes sooner.
The result can look like excessive hydration, even when the percentage is correct.
Watch for these signs:
- Dough starts strong but becomes loose later in bulk
- Surface looks glossy and overly relaxed
- Shaping feels weaker than earlier in the process
If you see those signs:
- Shorten bulk fermentation slightly
- Use cooler water next time
- Keep dough temperature more consistent
Often the issue is timing, not water content.
When it’s okay to reduce hydration (how to adjust in 2–3% steps)
If you consistently see spreading, weak structure, and difficulty shaping—even with good fermentation control—it may be time to lower hydration.
Make adjustments small and controlled:
- Reduce hydration by 2–3% on the next bake
- Keep flour, mixing method, and fermentation timing the same
- Compare structure, handling, and crumb before adjusting again
For example, if you were at 80%, move to 77–78% and evaluate. A small shift can noticeably improve strength without changing the bread style.
High hydration can produce excellent results, but it only works when flour strength, fermentation timing, and technique are right.
If those variables are stable, hydration becomes much easier to manage.
How to Adjust Hydration for Your Kitchen and Your Flour
Hydration can shift from season to season and flour to flour, even when your math is correct.
Humidity and temperature affect how dough feels and ferments, and different flour brands absorb water differently.
The goal is to adjust hydration on purpose, in small steps, so your dough behaves the way you expect.
Dry & cold season vs humid season adjustments
Dry/cold conditions often make dough feel tighter at the same hydration, while warm/humid conditions can make it feel stickier and looser sooner.
- Dry/cold: if the dough feels stiffer than usual, increase hydration by 2–3%.
- Warm/humid: if the dough spreads more or gets slack sooner, reduce hydration by 2–3%.
Change one variable at a time. If you also change fermentation timing, it becomes hard to tell what helped.
Fresh flour vs stored flour
Flour condition affects absorption.
A new bag can behave differently from an older bag, and flour stored in a humid space can already hold extra moisture.
- If a new bag or brand makes the dough feel different, keep the recipe the same and adjust hydration by 2–3% on the next bake.
- If stored flour makes dough feel wetter than expected, reduce hydration by 2–3% or switch to a fresher bag for your test bake.
A simple “dial-in” method (same recipe, small hydration steps)
This method isolates hydration as the only variable, so you learn faster.
- Bake your baseline recipe once, then bake it again at +2–3% hydration, and once more at –2–3% from baseline.
- Keep the flour, mixing method, and fermentation approach the same each time.
- Compare handling during shaping, how well it holds tension, and your final loaf height and crumb.
When you treat hydration as a controlled variable instead of a guess, small seasonal or flour changes stop being frustrating surprises and become simple adjustments you know how to make.
Mini Experiment: Find Your Best Hydration in 3 Bakes
This is a fast, controlled way to learn hydration in your own kitchen without changing ten variables at once.
You bake the same recipe three times, change only the water amount, and compare handling and results.
After three bakes, you’ll have a hydration range that matches your flour, your temperature, and the way you like to work with dough.
Bake 1: baseline %
Bake your recipe exactly as written and calculate the hydration you used. This becomes your reference point.
- Record the hydration % and dough temperature (if you track it).
- Note how it feels during mixing and shaping.
Bake 2: +2–3%
Bake the same recipe again, but increase hydration by 2–3%. Keep everything else the same.
- Same flour, same method, same fermentation approach.
- Watch whether the dough stretches more easily and whether it still holds tension during shaping.
Bake 3: -2–3%
Bake the recipe a third time at 2–3% lower hydration than your baseline. Again, keep everything else unchanged.
- Notice whether shaping gets easier.
- Compare loaf height and crumb openness to the other two bakes.
What to track (so the results are useful)
Track a few concrete things that connect directly to hydration decisions:
- Handling notes: stickiness level, stretching vs tearing, how well it tightens during shaping
- Final crumb: tight vs more open, even vs irregular holes
- Spread/height: did the loaf hold shape or relax wider, and how tall did it bake up
After these three bakes, you’ll have a hydration range you can trust in your own kitchen, and future tweaks will feel like small, confident adjustments instead of trial and error.
Now that you understand the numbers, here’s how to use them confidently
The Hydration Sweet Spot
Dough hydration is a dial you turn, not a grade you pass or fail. Once you know your percentage and what it tends to produce, you stop guessing and start making deliberate choices.
Pick a starting range from the chart that matches what you want to bake.
Calculate your hydration once using weights, then bake one standard recipe (not doubled) and write down what you see in the dough and the finished loaf. On the next bake, adjust hydration by 2–3% and keep everything else the same so you can clearly see what changed.
If you’re looking at the bowl thinking, “Is this right?”, hydration gives you a reference point. After a few intentional bakes, that question shifts to, “I know what I’m looking for.” And then it becomes simple: “I’m making it today.”