
Notice: I receive compensation if you buy something through affiliate links on this post. This does not change the price you would pay. As an Amazon Associate I earn from qualifying purchases.
My father introduced me to baking when I was in high school. One reminder he always repeats when we make his favorite chiffon cake is to mix in one direction. I didn’t ask why then.
Years later, I discovered the profound impact of different mixing methods in baking on the final results. It’s not just about dumping ingredients and mixing; there are crucial steps to follow.
There is a reason for creaming, folding, or whipping.
The correct technique can make a cake melt in your mouth, while the wrong one can leave it dry or rubbery.
Some methods build structure, while others prevent gluten from turning dough into a tough mess.
This guide will provide you with a comprehensive understanding of the most common mixing techniques in baking, explain when to use each, and share tips for fixing common mistakes in mixing.
I’m here to guide you through your baking journey and support you in creating the best treats.
Read on and learn how you can improve your baking skills and create the best treats.
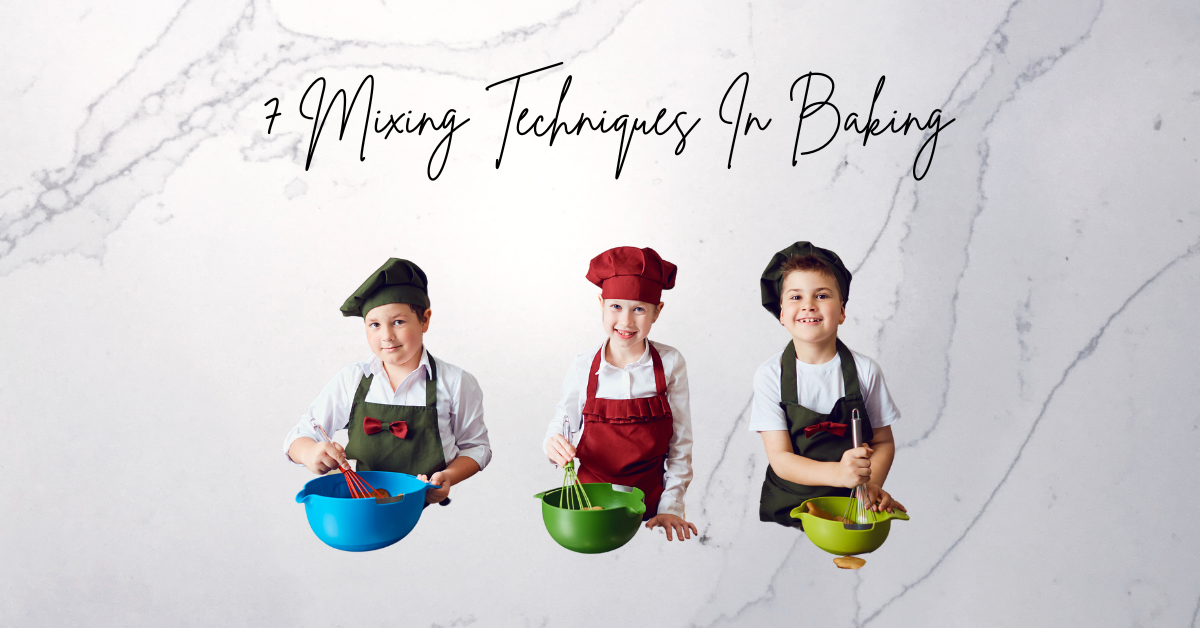
Table of Contents
Common Mixing Methods In Baking
Whether making a tender cake, flaky scones, or a perfectly risen loaf of bread, these mixing techniques in baking are essential to the final texture and structure.
Let’s break down the most common mixing techniques, how they work, and when to use them.
1. The Creaming Method
If you’ve ever baked a classic butter cake, you’ve probably used the creaming method of cake making—even if you didn’t realize it.
This technique, also known as the sugar batter method, is one of the secrets to fluffy cakes. When you beat butter and sugar together, you create tiny air pockets that make your cake rise and stay soft.
How to Do It:
- Bring butter to room temperature. It won’t blend well if it’s too cold, and if it’s too warm, it won’t hold air.
- Beat the butter and sugar together until the mixture turns pale and fluffy.
- Add eggs one at a time, mixing thoroughly after each addition.
- Alternate adding dry and wet ingredients, mixing just until combined. Overmixing can lead to a tough cake.
Best For:
- Pound cake
- Butter cake
- Cookies that need a soft, light texture.
Pro Tip: If your butter is too cold, cut it into cubes and let it sit for 10–15 minutes instead of microwaving (which can melt it unevenly).
2. The Muffin Method
This method goes by a few names — muffin, blending, or stirring method in baking.
How to Do It:
- Whisk together all the dry ingredients in a bowl.
- Mix your wet ingredients (eggs, milk, melted butter, or oil) in another bowl.
- Mix the wet ingredients into the dry mixture and slowly stir. Use a spatula or wooden spoon, but don’t beat the batter. Some lumps are okay.
- Stop mixing as soon as the flour is blended. Overmixing can create dense, chewy muffins by creating more gluten, making the texture less desirable.
Best For:
- Muffins
- Banana bread
- Pancakes and waffles
Pro Tip: If you want extra-soft muffins, let the batter rest for 10 minutes before scooping it into the pan.
3. The Biscuit Method (Flaky Goodness Every Time)
This baking technique is for biscuits and scones that are crisp on the outside and tender inside. Unlike cakes, where we want air incorporated, this method limits gluten development while layering fat for flakiness.
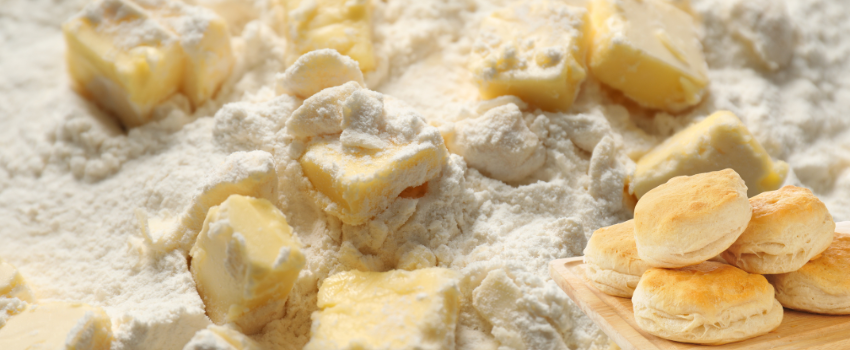
How to Do It:
- Whisk your dry ingredients together.
- Use a pastry cutter or your fingertips to cut cold butter or shortening into the flour until the mixture resembles coarse crumbs.
- Add liquid (milk, buttermilk, or cream) and stir until combined.
- Roll out the dough gently, folding it over itself a few times to create layers.
- Cut out your biscuits and bake until golden.
Best For:
- Biscuits
- Scones
- Pie crusts
Pro Tip: Keep your butter as cold as possible. If it softens, put everything in the fridge for 10 minutes before continuing.
4. Beating
The beating method in baking involves vigorous mixing to incorporate air, helping create structure and volume in batters.
When to Use It
The beating method is a key part of the creaming (butter-based cakes) and whisking methods (sponge cakes). By beating ingredients, especially butter, sugar, or eggs, you introduce air that helps cakes rise and stay soft.
How to Do It
- For butter and sugar: Start with room-temperature butter and sugar. Use a hand or stand mixer at medium to high speed, beating until the mixture turns pale and fluffy. This process can take 2–5 minutes.
- For eggs: If beating whole eggs, whisk them vigorously until they become pale and thick. If beating egg whites, use an electric mixer on high speed until soft or stiff peaks form (depending on the recipe).
- For batters: Once air is incorporated, gradually add dry ingredients and mix until combined to avoid overworking the batter.
Best For:
- Butter cakes (pound cake, yellow cake)
- Sponge cakes
- Meringues
Pro Tip: Overbeating can break down the air pockets you just created. If your cake batter looks curdled after adding eggs, don’t panic—it’ll smooth out once you add the flour.
5. The Foaming Method
Are you thinking light and airy? Cakes or souffles? You’re right.
Also known as the whipping or whisking method of cake making, it creates volume without added leavening agents like baking powder. It relies on eggs for structure and lift.

How to Do It:
- Separate the eggs if needed (some recipes call for whole eggs, while others require just the whites).
- Use a whisk or electric mixer to whip the eggs and sugar until it’s thick, pale, and doubled in volume. This step incorporates air, which is crucial for structure.
- Carefully fold in dry ingredients using the folding method in baking—a gentle motion that prevents deflating all that lovely air. This method is crucial in maintaining the airiness of the batter, which is essential for the cake’s light texture.
- Bake immediately because foamy batters don’t hold their structure for long.
Best For:
- Angel food cake
- Chiffon cake
- Meringues
Pro Tip: Use room-temperature eggs—they whip up better than cold ones.
6. The Straight Dough Method (No-Fuss Bread Baking)
Use this method if you love baking bread but don’t want to deal with complex techniques. It’s as simple as mixing everything in one go.
How to Do It:
- Combine all ingredients (flour, water, yeast, salt, and sometimes sugar or fat) in a mixing bowl.
- Knead the dough until it’s smooth and elastic—this develops gluten for structure.
- Let it rise until it doubles in size.
- Shape, proof, and bake.
Best For:
- Basic bread loaves
- Sandwich rolls
- Dinner rolls
Pro Tip: Don’t rush the rising process. Letting the dough rise slowly (even overnight in the fridge) improves flavor and texture.
7. The Sponge Method (Big Flavor)
This method requires a little extra time, but the results are worth it. The sponge method develops complex flavors by fermenting part of the dough before mixing everything.
How to Do It:
- Mix a portion of the flour, water, and yeast and let it sit for several hours or overnight. This process forms the “sponge.”
- Add the remaining ingredients and knead into a smooth dough.
- Let it rise, shape it, and bake as usual.
Best For:
- Sourdough
- Artisan breads
- Brioche
Pro Tip: The longer you let the sponge develop, the deeper the flavor. Some bakers let theirs ferment for up to 24 hours.
The Science Behind Mixing Techniques in Baking
There’s a science to mixing ingredients when you bake.
Every stir, beat, or whip affects gluten development, texture, and the interaction of your ingredients.
Understanding the science behind mixing can help you avoid common baking mistakes and achieve the perfect texture every time.
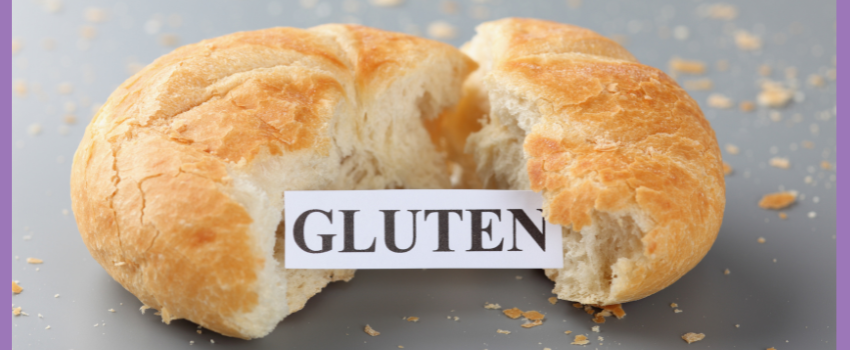
1. Gluten Development: The Key to Texture
Gluten is the protein network that gives baked goods structure. It’s what makes bread chewy and cakes tender.
But here’s the tricky part: gluten forms when flour and liquid mix and are agitated. Gluten becomes stronger the more you mix.
When You Will Want More Gluten (Strong Structure)
You want a well-developed gluten structure for yeast breads, bagels, and pizza dough. That’s why we knead bread dough to strengthen the gluten, trapping gas from the yeast and allowing it to rise.
When You Will Want Less Gluten (Tender Bakes)
Too much gluten is a problem for cakes, muffins, and cookies.
Overmixing leads to tough textures instead of soft and delicate ones. That’s why recipes using the blending method in baking or the creaming method of cake making often instruct you to mix “just until combined.”
Pro Tip: If you want a more tender cake or muffin, try using cake flour—it has lower protein, which means less gluten development.
2. Overmixing vs. Undermixing: Finding the Sweet Spot
Getting the perfect bake is all about balance. Mix too much, and you get dense, tough textures. Mix too little, and your ingredients won’t blend enough.
What Happens When You Overmix?
- Too much mixing develops the gluten in cakes and muffins, leading to a chewy, dense texture instead of a light and fluffy one.
- Overmixing can make cookies tough instead of tender and slightly crisp.
- In biscuits and pie crusts (which use the biscuit method), overmixing causes the butter to blend too much with the flour, reducing flakiness.
What Happens When You Undermix?
- If flour isn’t fully incorporated, your batter might have dry streaks.
- Cakes and muffins may not rise properly if the leavening agents (baking powder or soda) are not distributed evenly.
- Cookies can bake unevenly, with some parts spreading more than others.
Pro Tip: When making muffins or quick breads, stir until no dry flour is visible. A few lumps are okay—they’ll bake out.
3. Ingredient Temperature: Why It’s a Game-Changer
Temperature plays a huge role in how ingredients mix and behave.
Room-Temperature Ingredients for Smooth Mixing
For recipes using the creaming method, starting with room-temperature butter and eggs is essential. Cold butter won’t whip properly; cold eggs can cause the batter to curdle.
- Butter: When beaten with sugar, softened butter traps air, creating a light and fluffy texture. If it’s too cold, it won’t mix well.
- Eggs: Room-temperature eggs mix more evenly into batters. Cold eggs can cause butter to seize up, creating uneven texture.
Cold Ingredients for Flaky Texture
On the flip side, some recipes—like those using the biscuit method—rely on cold butter. Keeping butter cold prevents it from thoroughly blending into the flour. When it melts in the oven, it produces steam, leading to flakiness.
- Pie Crusts & Biscuits: Use chilled butter and refrigerate your flour for extra flakiness.
- Whipped Cream: For the whipping method in baking, cold heavy cream whips faster and holds its shape better.
Pro Tip: Did you forget to bring your eggs to room temperature? Place them in a bowl of warm water for 5–10 minutes to speed things up.
Choosing the Right Tool for the Job
Mixing might seem simple—just grab a spoon and stir, right?
But the right tool can make a huge difference in your baking results.
Whether you’re whipping cream, kneading dough, or gently folding ingredients, knowing when to use a stand mixer, hand mixer, or mix by hand can save you time and effort.
Let’s break down the best tools for the job.
1. Stand Mixer: The Powerhouse
A stand mixer is your best friend if you bake frequently or love making bread, cakes, and cookies. It does the heavy lifting—beating butter, whipping egg whites, and kneading dough—without tiring your arms.
Best for:
✔️ Creaming butter and sugar (perfect for the creaming technique).
✔️ Kneading bread dough (great for yeast-based recipes).
✔️ Whipping cream and egg whites
Pros:
✅ Hands-free operation.
✅ Powerful and consistent mixing.
✅ Various attachments for different tasks.
Cons:
❌ Bulky—takes up counter space.
❌ Pricier than other options.
2. Hand Mixer: Versatile Workhorse
A hand mixer is a fantastic middle ground. It’s lightweight, easy to store, and gives you more control than a stand mixer. While it can’t knead dough, it’s perfect for cakes, muffins, and cookies.
Best for:
✔️ Blending wet and dry ingredients.
✔️ Whipping cream and egg whites.
✔️ Beating eggs and sugar for light cakes.
Pros:
✅ More affordable than a stand mixer.
✅ Compact and easy to store.
✅ Faster than mixing by hand.
Cons:
❌ Requires you to hold it while mixing.
❌ Not powerful enough for kneading dough.
3. Mixing by Hand: Simple but Effective
Sometimes, a simple spoon or whisk is all you need.
Mixing by hand is ideal for delicate batters, such as muffins and pancakes, where overmixing is a concern. It’s also the best way to learn how ingredients interact, which is great for beginner bakers.
Best for:
✔️ Muffins, quick breads, and pancakes (to prevent overmixing).
✔️ Delicate batters that don’t need much air ( for sponge cakes and soufflés).
✔️ Gently combining ingredients without aeration.
Pros:
✅ No special equipment is needed.
✅ Full control over mixing.
✅ Less risk of overmixing.
Cons:
❌ Takes more effort and time.
❌ Can be inconsistent if not done correctly.
4. Mixer Attachments: Choosing the Right Tool
Stand mixers and some hand mixers have multiple attachments, each designed for different mixing methods. Using the right one ensures the best texture and consistency in your baked goods.
🍪 Paddle Attachment (Flat Beater)
This accessory is the preferred tool for most baking tasks. It’s perfect for creaming butter and sugar (conventional) and gently mixing cookie dough and cake batters.
✔️ Best for: Cakes, cookies, frostings, and mashed potatoes.
🥖 Dough Hook
The dough hook makes kneading easy. Whether you’re making bread or pizza dough, this attachment helps develop gluten without tiring your arms.
✔️ Best for: Yeast breads, bagels, and brioche.
🍰 Whisk Attachment
Use the whisk for volume and aeration. It’s essential for whipping egg whites or heavy cream when making sponge cakes and meringues.
✔️ Best for: Meringues, whipped cream, and chiffon cakes.
Let’s explore some tips for mixing your batters and dough correctly.
Mastering the Mix: Tips for Perfect Baking
Mixing baking ingredients might seem straightforward.
But it can either make or break your baked goods.
Overmixing leads to tough textures while undermixing results in uneven, dense bakes.
Let’s review some simple tips to ensure your mixing method works with you, not against you.
1. Overmixing vs. Undermixing: Finding the Sweet Spot
Have you ever had muffins that turned out dense and chewy instead of soft and fluffy or cookies that spread too much and became greasy? These problems are likely caused by over- or under-mixing.
🚨 The Dangers of Overmixing
Overmixing happens when you work the batter too much, especially in recipes that contain flour. It activates the gluten, which is excellent for bread (hello, chewy sourdough) but not so great for cakes and muffins.
🔴 Signs you’ve overmixed:
❌ Tough, rubbery cakes
❌ Dense muffins instead of light and fluffy ones
❌ Cookies that spread too much
🔹 How to avoid it:
✅ For cakes, muffins, and cookies, mix until combined and stop.
✅ Stir ingredients when working with quick bread gently.
✅ If using a stand mixer, stick to low speed for delicate batters.
⚠️ The Risks of Undermixing
When you undermix, the ingredients aren’t fully incorporated. It can create streaks of flour, uneven textures, or pockets of baking powder that won’t activate.
🔴 Signs you’ve undermixed:
❌ Streaks of flour or lumps in the batter
❌ Uneven rise in cakes and breads
❌ Dry spots in muffins
🔹 How to fix it:
✅ Always scrape the bottom and sides of the bowl to get any hidden flour pockets.
✅ For recipes using the whisking method, ensure eggs are fully aerated before adding other ingredients.
✅ When folding ingredients, use a gentle but thorough hand—don’t leave streaks of unmixed batter.
2. Best Practices for Achieving the Perfect Consistency
🧁 Start Slow and Be Patient
Mixing too fast right from the start can cause splatters, overworking, or uneven blending. Instead:
✔️ Begin at a low speed and gradually increase if needed.
✔️ When using a hand or stand mixer, pulse it a few times before going full speed.
🥄 Know When to Use the Right Mixing Method
Different baked goods require different techniques:
✔️ For fluffy cakes: Use the creaming method to incorporate air properly.
✔️ For delicate batters: Use the folding method in baking to prevent deflating aerated ingredients.
✔️ For muffins and quick bread: The blending method ensures tender, moist results without overdeveloping gluten.
🍶 Don’t Rush Ingredient Temperature
Mixing cold butter with sugar won’t create the creamy texture you need. And adding hot liquids to eggs? You might end up with scrambled eggs in your batter.
✔️ Butter should be softened (not melted) for creaming.
✔️ Eggs mix best at room temperature—take them out 30 minutes before baking.
✔️ For yeast doughs, liquids should be warm, not hot—too much heat can kill the yeast.
👀 Pay Attention to Visual Cues
Instead of relying on mixing times, watch for these signs:
✔️ A creamed butter and sugar mixture should be pale and fluffy.
✔️ Whipped egg whites should hold soft or stiff peaks, depending on the recipe.
✔️ Dough for cookies should be evenly mixed but not sticky or overworked.
Common Mixing Mistakes and How to Fix Them
Let’s break down the most common mixing mistakes and how to fix them.
1. Dense, Heavy Cakes
Why It Happens: Overmixing or undermixing the batter can lead to dense cakes.
How to Fix It:
- Using the creaming method, beat butter and sugar until the mixture is pale and fluffy—this step helps incorporate air.
- If whipping eggs, ensure they are properly aerated before adding dry ingredients.
- Mix until the ingredients are just combined.
- Always measure ingredients accurately. Too much flour or too little leavening can weigh a cake down.
2. Tough, Dry Biscuits and Scones
Why It Happens: Overworking the dough is the main culprit.
The biscuit method relies on keeping butter or shortening in small, solid pieces to create a flaky texture. The biscuits become tough if the fat gets too warm or is overmixed.
How to Fix It:
- Use cold butter and handle the dough as little as possible. I grate frozen butter into the flour to ensure small, even pieces.
- When adding liquid, stir gently— enough to bring the dough together.
- If rolling out dough, do so lightly. Pressing too hard can compact the layers and ruin flakiness.
3. Curdled or Broken Batters
Why It Happens: This usually happens when ingredients are at different temperatures. For example, the batter can separate by adding cold eggs or milk to room-temperature butter. Overbeating can also cause curdling in delicate batters like those used in the sugar batter method.
How to Fix It:
- Always use room-temperature ingredients—take eggs, butter, and dairy out of the fridge about 30 minutes before baking.
- Add a spoonful of flour if the batter starts to curdle. It will help bind it back together.
- Add eggs slowly, beating well between each addition using the creaming method.
4. Gummy, Gluey Muffins and Quick Breads
Why It Happens: Overmixing is the main issue here. The blending method in baking (used in muffins and banana bread) requires minimal stirring. Too much stirring develops gluten, creating a chewy texture instead of a tender crumb.
How to Fix It:
- Separately mix the wet and dry ingredients before combining.
- Stir gently with a spatula or spoon until no dry flour remains. A few lumps are okay!
- Bake immediately after mixing—letting the batter sit can affect the texture.
5. Deflated Sponge Cakes and Meringues
Why It Happens: Folding too aggressively, under-whipping egg whites, or using a greasy bowl can prevent the batter from holding its structure. The foaming method, which includes the whisking method of cake making and the folding method in baking, relies on properly aerated eggs for volume.
How to Fix It:
- Whip egg until soft or stiff peaks form, depending on the recipe.
- Use a clean, grease-free bowl (wipe with vinegar or lemon juice to be sure).
- Fold gently with a spatula—cut through the center, scoop from the bottom, and turn the batter over without deflating it.
6. Unevenly Mixed Doughs and Batters
Why It Happens: Rushing through the mixing process or not scraping down the bowl can leave streaks of dry ingredients or unevenly incorporated fat.
How to Fix It:
- Use the stirring method in baking for gentle mixing when necessary.
- Always scrape down the sides of the bowl while mixing.
- If using a stand mixer, avoid over-relying on it—sometimes, a final mix by hand ensures everything is well incorporated.
Mastering the Art of Mixing
You’ve probably heard that baking is a science.
Most of that science happens when ingredients come together during mixing, which is why different mixing methods yield different results.
Now you know why understanding these mixing methods in baking empowers us to create the perfect bake every time.
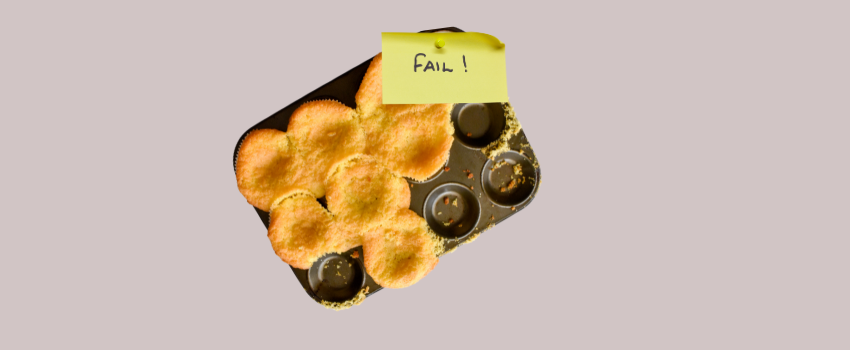
This guide also gave you tips to achieve mixing success and how to fix baking fails.
Go on. Apply what you’ve learned.
Remember that the more you bake and use these baking techniques, the quicker you’ll develop the eye and feel when you’ve kneaded dough enough or mixed cake batter to the right consistency.
Then, you’ll soon realize that matching any mixing technique to your kind of baking has become second nature.