
Notice: I receive compensation if you buy something through affiliate links on this post. This does not change the price you would pay. As an Amazon Associate I earn from qualifying purchases.
QUICK OVERVIEW:
Simple speed rule
- Speed 1 to bring the dough together (until no dry flour remains)
- Speed 2 to knead and develop gluten
- Avoid high speeds—they can overheat dough and stress your mixer
Typical kneading times (start checking early)
- Lean bread dough: 4–6 minutes after it comes together
- Enriched dough (cinnamon rolls/rolls/brioche-style): 6–10 minutes
- High-hydration dough (ciabatta/focaccia-style, some sourdoughs): 3–5 minutes + short rests
- Whole wheat/mixed grain: 4–7 minutes (use shorter knead + rest cycles; don’t chase a paper-thin windowpane)
- Very stiff dough (bagels/pretzels): 8–10 minutes, but knead in 1–2 minute blocks with rests
How to tell dough is kneaded enough (stop by cues, not just minutes)
- Dough turns smoother and elastic (not shaggy)
- Dough looks cohesive (often starts clearing the bowl, depending on hydration)
- Windowpane test: stretches before tearing
- Poke test: slowly springs back
- Feels tacky, not wet and smearing
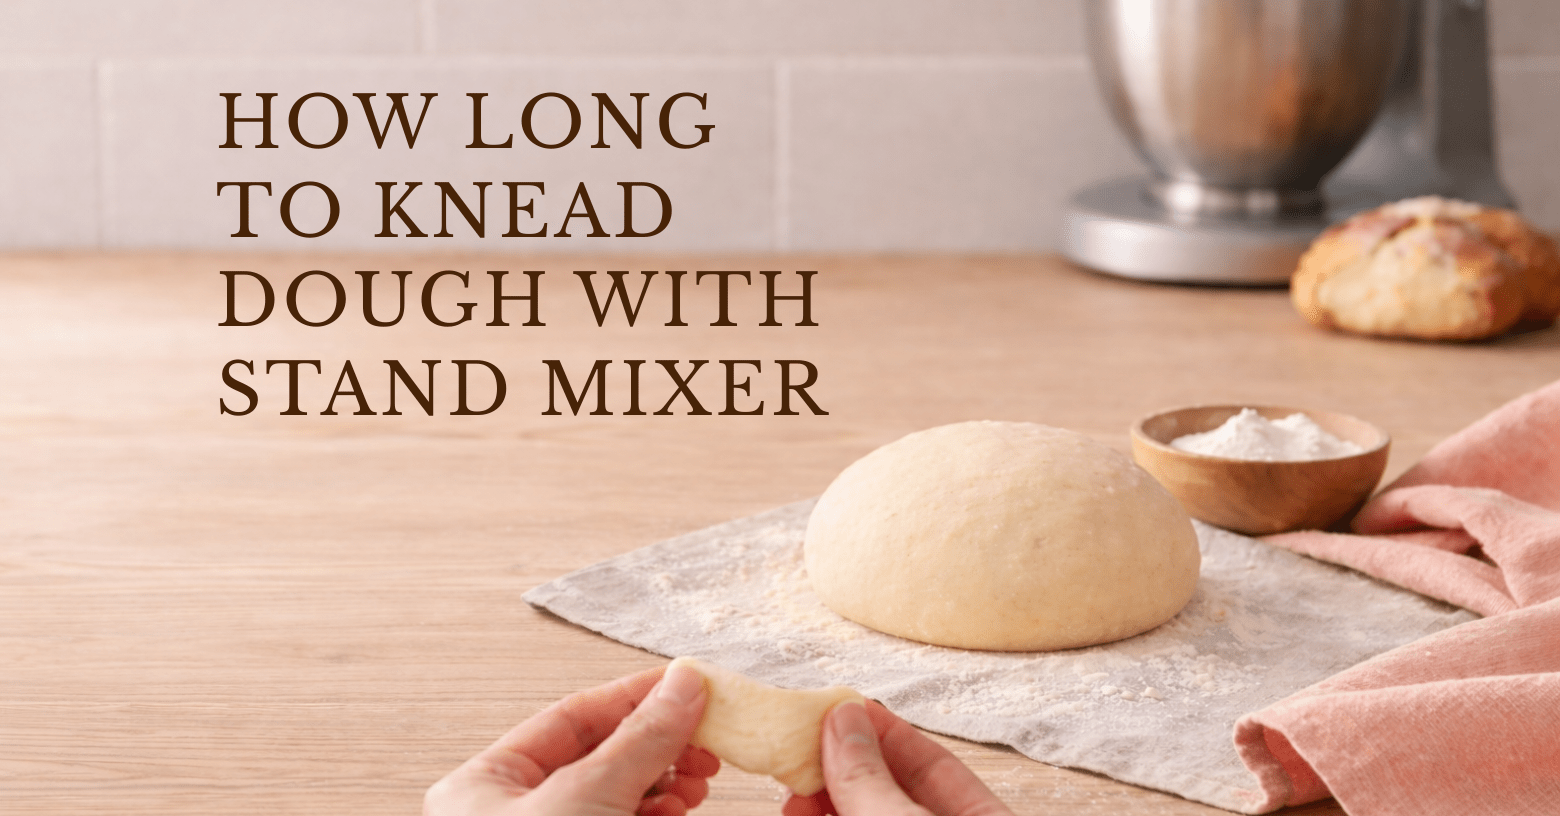
You turn on the stand mixer, add the flour, and let the dough hook do the work.
Minutes in, you’re trying to figure out how long to knead dough with stand mixer without overdoing it.
The dough looks smoother, but is it properly kneaded, or just pretending?
Recipes toss out numbers as if they are universal.
Meanwhile, your dough is sticky and smearing on your fingers, or tight and fighting the hook, or climbing up like it’s trying to escape.
And the longer it runs, the more you wonder… Am I under-kneading? Over-kneading? Is my mixer about to start walking across the counter?
I’ve had the same struggle. I still remember the soft whir of the motor, flour dust clinging to the bowl, and that warm, yeasty smell rising as I stopped and started the mixer, second-guessing every minute.
I’ve under-kneaded and ended up with dense bread. I’ve overdone it, and the dough tore instead of stretching.
This post fixes that. You’ll get realistic kneading time ranges by dough type, the right speeds to use, and the simple “done” signals (windowpane, poke test, texture cues) so you can stop at the right moment, and enjoy soft, well-risen bread that tastes as good as it smells.
Let’s start with the basics…
Not sure if kneading is the problem? Start with the Bread Troubleshooting Hub to match what you saw to the right stage.
Table of Contents
- 1 Can You Knead Dough in a Stand Mixer?
- 2 How Long to Knead Dough with Stand Mixer?
- 3 What Speed Should You Knead Dough in a Stand Mixer?
- 4 How Do You Know When Dough is Kneaded Enough in a Stand Mixer?
- 5 Can You Over-Knead Dough in a Stand Mixer?
- 6 How Long to Knead Cinnamon Roll Dough in Stand Mixer?
- 7 Mix It. Knead It. Bake It Today.
- 8 FAQ’S
Can You Knead Dough in a Stand Mixer?
Yes, you can, and it’s one of the easiest ways to develop gluten consistently without wearing out your arms like you’ve been kneading a stress ball for ten straight minutes.
The key is using the right attachment, the right speed, and stopping based on dough cues, not just the clock.
What stand mixer attachment is best for kneading?
To knead dough using a stand mixer, use an attachment built to stretch and fold dough repeatedly (that’s what develops gluten).
Best choice: the dough hook
- C-hook (common on tilt-head mixers): Great for typical home doughs (sandwich bread, rolls, cinnamon rolls).
- Spiral dough hook (common on bowl-lift or European-style mixers): Tends to knead more efficiently because it pushes dough down and around the bowl, not up the hook.
Dough hook vs spiral hook (quick difference)
- C-hook: More “pull and climb” behavior is possible, especially with smaller batches.
- Spiral hook: Often keeps dough lower in the bowl. Gluten develops faster or more evenly.
What not to use for kneading
- Wire whip/whisk: Not designed for dough resistance. It can bend, strain the mixer, and won’t knead properly.
- Flat beater/paddle (for true kneading): Fine for mixing sticky doughs at the start, but it doesn’t knead well like a dough hook. Use it only to combine ingredients, then switch to the dough hook for kneading.
Quick real-life note: If your dough starts riding up the hook while kneading, it’s usually fixable (hydration, speed, or batch size). Here’s the step-by-step fix: dough climbing up the hook.
If you’re considering a higher-capacity machine for frequent dough work, see my KitchenAid 7-quart mixer review.
Stand mixer kneading vs hand kneading (Is the duration the same?)
No. Stand mixers knead faster and more intensely than hands, which is why “mixer minutes” can feel like they count double.
A simple rule of thumb:
- 8–10 minutes by hand often equals 4–6 minutes in a stand mixer
- Stiffer doughs (bagels, low-hydration bread) may need longer kneading, even in a mixer
- Enriched doughs (with butter/eggs/sugar, like cinnamon rolls) can take longer to reach full elasticity
How to use this without overthinking it:
- Use time to get close… then start checking the dough.
- If the dough is smooth, elastic, and stretchy (not tearing easily), you’re there.
- If it’s still shaggy or ripping when stretched, give it another minute and check again.
If you’re deciding whether a Bosch is a good fit for your baking, see my Bosch stand mixer review.
How Long to Knead Dough with Stand Mixer?
Use this chart as a starting point, not a hard stop. Kneading time varies by dough type, hydration, and batch size, so begin checking early and let the dough’s texture and elasticity tell you when to stop.
Mini Kneading Time Chart (By Dough Type)
| Dough type | Stand mixer kneading time | What to look for / notes |
|---|---|---|
| Lean bread dough (basic white, sandwich bread) | 4–6 min after dough comes together | Check for smoothness & elasticity. |
| Enriched dough (with milk, eggs, butter. Ex. rolls, cinnamon rolls, brioche-style) | 6–10 min | Usually takes longer because fat & sugar slow gluten development. |
| High-hydration dough (soft, slack, sticky) | 3–5 min often with short rests | Examples: ciabatta, focaccia, no-knead–style artisan loaves, some sourdoughs. Strengthens fast. Benefits more from brief pauses than nonstop kneading. |
| Whole wheat / mixed-grain | 4–7 min | Feels tighter & less stretchy. Don’t chase a paper-thin windowpane. Use short knead & rest cycles, and let time & fermentation build strength. |
| Very stiff dough (bagels, pretzels) | 8–10 min 1–2 min blocks + rests | Easiest dough to overwork (and to overwork your mixer). If the mixer is straining: stop, rest, or finish the last bit by hand. |
Batch size note (applies to all doughs): dough kneads best when the hook “grabs” it.
- Too small: kneads unevenly and may ride up the hook
- Too large: strains the mixer and heats the dough faster
Rule of thumb: if your mixer is walking, banging, or groaning, the batch is too stiff or too big for that machine.
How to use the chart (without overthinking it)
- Start your timer after the dough is fully combined, not from the moment you turn the mixer on.
- Knead on the proper speed (usually low to medium-low).
- Begin checking the dough 1–2 minutes before the upper limit.
- Stop as soon as the dough shows clear signs of development. Don’t knead “just to hit the number.”
Why does kneading time vary so much?
Two doughs can use the same recipe and still knead differently because of:
- Flour protein and brand
- Humidity and hydration
- Batch size relative to your bowl
- Dough temperature
- Mixer strength and hook design
That’s why experienced bakers don’t knead to a minute; they knead to a texture.
See ‘Enriched dough kneading time in a stand mixer‘ for more details.
If you’re deciding between models, see my KitchenAid stand mixer comparison to match mixer type and bowl size to the doughs you make most.
Next up: we’ll dial this in further by answering a common follow-up question: what speed should you knead dough in a stand mixer?
What Speed Should You Knead Dough in a Stand Mixer?
Most home bakers keep it simple: start slow to combine, then knead on a low, steady speed. Faster isn’t better here. It usually just heats the dough faster and puts extra strain on your mixer.
The safest default speed for kneading (and why)
Use this as your baseline:
- Speed 1: bring the dough together
- Speed 2: knead and develop gluten
Why this works:
- Consistent gluten development: Kneading is about repeated stretch-and-fold, not high RPM.
- Less heat buildup: Higher speeds warm the dough quickly, and warm dough can turn sticky and harder to handle.
- Kinder to the mixer: Dough is heavy. Low speeds reduce stress on the motor/gears.
KitchenAid kneading times and speeds (use Speed 2).
Speed 1 vs Speed 2
Use Speed 1 when you’re trying to:
- Incorporate flour without a dust cloud
- Hydrate the flour evenly (especially if the dough starts shaggy)
- Keep ingredients from splashing (eggs, milk, etc.)
- Bring the dough into a rough mass before kneading
Use Speed 2 when you’re ready to:
- Develop gluten (elasticity & strength)
- Smooth the dough out
- Help it start pulling away from the bowl into a cohesive ball (depending on hydration)
A simple workflow that works for most doughs:
- 30–60 seconds on Speed 1 (until no dry flour remains)
- Switch to Speed 2 and knead until the dough looks smooth & elastic
If your dough climbs the hook while kneading (quick note)
If your dough keeps riding up the hook, don’t crank the speed. Check the two big causes first:
- Batch size: very small batches knead unevenly and climb more
- Hydration/stiffness: very wet or very stiff doughs misbehave faster
Next up: how to tell when your dough is fully kneaded by look and feel, not just by minutes.
How Do You Know When Dough is Kneaded Enough in a Stand Mixer?
Don’t rely on minutes alone. Dough is “done” when the gluten has developed enough to stretch, trap gas, and hold shape. Think of gluten like a net: kneading tightens and organizes the strands until the dough can hold air without ripping.
The 5 “done” signals
- Smoother & elastic (not shaggy)
The dough goes from rough and torn-looking to satiny and stretchy. It’s less like a crumbled blanket and more like a single smooth sheet. - Dough starts clearing the bowl & looks cohesive
Most doughs will begin to pull away from the sides of the bowl as gluten strengthens.
Note: Very wet doughs (like focaccia or ciabatta-style) may still cling. Focus more on stretch and structure than on a perfectly “clean bowl.” - Windowpane test (best overall check)
Pinch off a small piece. Gently stretch it between your fingers.- Ready: it stretches into a thin “window” before tearing. You don’t need it paper-thin, just thin enough that light could slightly pass through.
- Not ready: it rips quickly and feels tight or grainy. If it tears before it thins, it needs more development, or a short rest.
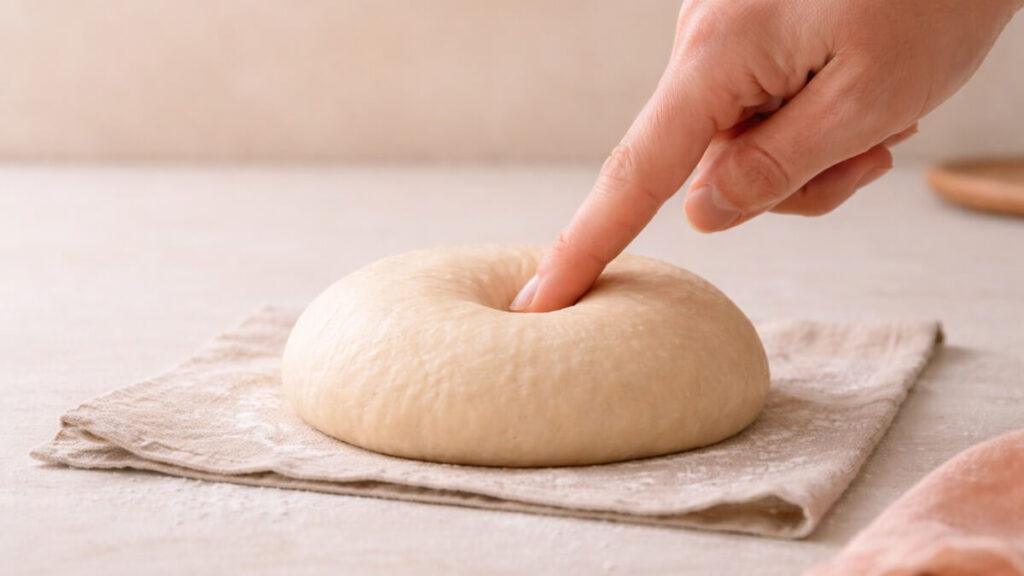
- Poke test bounce-back
Lightly poke the dough with a fingertip.- Ready: the dent springs back slowly and partially
- Not ready: it stays sunken and feels slack, or it tears easily when handled
- Tacky, not sloppy-sticky (this matters)
- Tacky: slightly sticky but manageable; it releases from your finger with a little pull
- Sloppy-sticky: wet, gluey, smears on your hand, and won’t hold its shape. It usually needs more structure (a bit more kneading & a rest) or a hydration adjustment.
If the dough feels wet and hard to control even after mixing, see Why Is My Dough So Sticky?
If your dough never passes the windowpane test…
Before you assume you “failed,” check these common causes:
- It needs a rest, not more kneading
Stop the mixer, cover the bowl, and rest for 10 minutes. Sometimes gluten needs more time to hydrate and relax so it can stretch instead of snapping. - Hydration mismatch
- Too dry: dough feels tight and tears early
- Too wet: dough feels slack and won’t hold a thin window
- Flour or liquid differences (humidity, measuring, flour brand).
- Whole grains behave differently
Whole wheat and mixed-grain doughs often won’t form a paper-thin windowpane like white bread dough. Aim for noticeable elasticity and cohesion, not perfection.
If you’re choosing a machine for bread, start here: my best stand mixer for bread dough guide breaks down which models handle kneading without stalling.
Next question: Can you over-knead dough in a stand mixer? Let’s find out. Plus, the quick signs you’ve gone too far.
Can You Over-Knead Dough in a Stand Mixer?
Signs you may be over-kneading
Look for a cluster of these signs (one alone isn’t always proof):
- Dough feels too tight and fights you when you try to shape it
- Tears easily when stretched instead of stretching smoothly
- Looks slick or overly shiny and starts to look “ropey.”
- The dough is warming up noticeably (warm dough can get sticky and hard to handle)
- The mixer is straining, or the dough is slapping hard around the bowl (often a sign you’re past the sweet spot or the dough is too stiff for that batch size)
What to do if you think you over-kneaded
Don’t panic. Try this sequence:
- Stop kneading and rest the dough
Cover it and let it sit 10–20 minutes. This relaxes gluten and can make the dough workable again. - Reassess with a gentle test
After resting, stretch a small piece. If it stretches better and doesn’t tear as quickly, you’re back in business. - If it’s too warm, cool it down
Move it to a cooler spot (or briefly chill the bowl) before continuing with shaping/proofing.
Adjust next time (to prevent it)
- Reduce kneading time: Start checking 1–2 minutes earlier than you usually do.
- Keep kneading speed conservative: Low and steady beats fast.
- Match batch size to your mixer: Very small dough batches can climb and overwork unevenly, while very large batches can strain the motor.
Watch dough temperature: If the dough is getting warm, that’s your cue to check sooner (or take a short rest).
How Long to Knead Cinnamon Roll Dough in Stand Mixer?
For soft, fluffy cinnamon rolls, kneading is about building enough gluten to trap air, without making the dough tight or dry.
Cinnamon roll dough kneading time
Most cinnamon roll doughs need 6–10 minutes of kneading in a stand mixer after the dough comes together.
Use the time as a guide, then switch to texture cues:
- Knead until the dough becomes smooth and elastic
- Start checking around the 6-minute mark
- Stop as soon as it stretches well without tearing
Why the range is wider here: cinnamon roll dough is enriched (milk, eggs, butter, sugar). Those ingredients slow gluten development, so it naturally takes longer than lean bread dough.
Cinnamon roll dough “done” texture
You’re aiming for dough that feels:
- Soft and satiny, not rough
- Slightly tacky, but not sticky or wet
- Stretchy, able to form a gentle windowpane without ripping
A helpful mental check: it should feel more like a soft pillow than a tight rubber ball. If it’s pulling back hard or tearing, it needs more time (or a short rest). If it’s loose and smearing, it likely needs more structure or a brief rest before continuing.
Once the dough hits this texture, stop kneading, even if you’re under the maximum time. Cinnamon roll dough improves more from rest and fermentation than extra mixer minutes.
Here’ a recipe for Perfectly Pillowy Cinnamon Rolls.
Mix It. Knead It. Bake It Today.
Sometime ago, you were standing over the mixer like a referee: watching the hook spin, squinting at the dough, and wondering if you should stop now… or keep going “just in case.” That uncertainty is the part that ruins the fun.
Now you’ve got something better than a random number.
You know what speed to use, how kneading time changes by dough type, and the quick checks that tell you clearly when the dough is ready.
No guessing. No hovering. Just a calm, confident stop when the dough turns smooth, stretchy, and alive in your hands.
And here’s what that unlocks: dough that’s easier to shape, a rise that actually looks like a rise, and bread that bakes up the way you hoped it would—light, springy, and fragrant.
The kind of loaf that crackles softly as it cools, fills the kitchen with that warm, yeasty aroma, and tears open with a tender crumb instead of a dense, heavy bite. The kind of cinnamon rolls that pull apart in soft layers and stay pillowy, not tough.
So next time you mix a batch, don’t knead “until you’re tired.” Knead with a plan. Start your timer, watch for the cues, and trust your hands.
Then bake it…because the best way to lock in this skill is to use it while your kitchen is still dusted with flour and the oven is already warming up.